Tuesday 11 November 2014

In Flanders Fields the Poppies Blow

"At the going down of the sun and in the morning,
We will remember them.
" -Ode of Remembrance, Laurence Binyon

Today is Armistice/Remembrance Day. Today is the day when we remember all the soldiers who have died for their country, for our freedom, for us. It is strange to think that a hundred years ago, men were fighting in the Great War... For me. Fighting so that I, a woman in the future, forever unknown to them, could live in a free country. They fought not just for me, but for everyone. They died not for their futures, but for ours.

So at the eleventh hour, of the eleventh day, of the eleventh month (when the ceasefire for the First World War was officially sanctioned) we honour their sacrifice with a two minute silence.

The Tower's poppies, each one a fallen soldier.
Of course, any of my British friends reading this blog will hardly need reminding of this yearly memorial to not just the fallen soldiers of the First World War, but the fallen soldiers of every conflict since (and even perhaps, as many re-enactor friends of mine might be compelled to feel, fallen soldiers of conflicts past). Yet a few weeks ago, I was in London, meeting up with my Dutch friends who were over for a holiday. Anyone who has ever been in England (and no doubt all of Britain) at the end of October and early November, will know that the country(s) is swamped in poppies, mostly paper ones pinned to coat lapels. This year, the centenary of the First World War, the Tower of London has been literally been surrounded with poppies; a scarlet, ceramic flower, one for each soldier lost. It's quite awesome, in the most literal sense of the word. My Dutch friends, fresh off their flight, had to enquire about the poppies; they'd been to England before, but they'd never seen our reverence to this flower before. So I explained; I explained about Remembrance Day, about the poem In Flanders Fields, about The Royal British Legion, the Poppy Appeal (the fund raiser for the aforementioned) and about the significance of why the poppy has become our symbol of remembrance. It was strange to have to explain something so integral to life in the British autumn. the way I understand it is we are far from being unique in this tradition; Armistice Day is commemorated in many other countries who were involved in the First World War and Remembrance Day is observed by the Commonwealth (and America have Veterans Day, which remembers all who have served, whether they died or survived). I'm sure other countries have their own memorials in other forms. It was just interesting, as I've felt that, as a nation, Britain has feels very strongly about those we lost in the First World War, especially this year. Perhaps it is reminiscent of our Victorian history, to revere and honour our dead. But the interesting thing was that the Netherlands were neutral during the First World War. Here we all were in a country remembering a conflict from a century ago; my friends must have found it a little surreal, for the British to be so thankful for something the Dutch mostly removed themselves from.

I don't know. It's the small cultural differences that I always find the most fascinating.

My first ever crochet poppy.
Wearing a poppy is a sign of respect. The Poppy Appeal give out paper poppies in return for donations; I think most people donate and, certainly, a great number of people can be seen wearing poppies around this time of year. But why is any of this on my craft blog? This is more ethnography than needle work.

Around this time last year I was starting to develop an interest in crochet. I was living with another avid knitter and an avid crocheter and was really fascinated by some of the stuff she produced. I was also working on a knitting pattern that suggested crocheting a border to the finished garment (my Harlequin slippers). I'd already crocheted myself a very simple case, that was really just a tube, to store my crochet hooks in (they're a vital knitting tool; perfect for picking up dropped stitches) but wanted another, simple pattern to improve my abilities. The thought occurred to me that maybe I could make myself a more permanent poppy; I originally looked at knitted patterns but after a short while concluded that I didn't really like the way they looked. Hence, I decided to look for crochet patterns; these were much more to my liking and the Ravelry ratings suggested that the patterns were relatively easy. So, hook in hand, I set to work and crocheted myself a little, bright poppy to wear on my coat (my coat, with poppy attached, that I accidentally left the other side of the country at my parent's place, so I've not been able to wear it this November).

Remembrance Poppies of 2014
I was pleased with my work. Pleased, but not so much that crochet became a regular thing; to be fair, all I had crocheted since was an amigurumi pumpkin for a friend. Too much knitting, too much reading (and, as I know I repeat in almost every post, too much degree). Anyway, I didn't think much of it after November, although I received quite a few compliments at the time. It wasn't until one of the girls on my course asked me if I would make her a poppy that I really thought about it again. It occurred to me that maybe other friends of mine would also like a poppy. After a status update on the book of face, I was commissioned to make about twenty crochet poppies. I asked for no money because a) that sort of defeats the object of charity crafting and b) two years ago a woman sold poppies and, although she donated 100% of her proceeds to The Royal British Legion, was accused of breaching copyright. I did ask, however, that people receiving the poppies make a donation at some point. Although, to be perfectly frank, the pattern I used doesn't match the poppies used my The Royal British Legion; the pattern was designed by an American and the leaf is shaped differently. So it is just a poppy rather than an imitation of the Royal British Legion's poppy.

I'll confess, I only managed to complete twelve of the twenty poppies requested before today. I appreciate the importance of today, but I did have an exam yesterday, which has been my priority these past two weeks. So for anyone who did not receive their poppy, I am more than happy to make you one still, as long as you don't mind having it post-Remembrance Day.

Petals and centre.
After having crocheted so many poppies in such a short space of time (many I did on the car journey down to London to see the poppies at the Tower), I do feel more confident about my skills. I think it is a great pattern for a new crocheter; it features in the round and straight (is that the right term?) crocheting but also features pretty much every stitch you need. the only thing it doesn't involve is increasing and decreasing. Plus, the whole project can be finished in less than an hour (even when it was my first one and I had no idea what I was doing; it works up very quickly). As I mentioned earlier, the pattern is American so this time I did translate it. For those who are not aware, the US and the UK use different crochet terms. It's not difficult to translate, as UK terms are pretty much US +1 (e.g., a US single crochet becomes a double crochet in the UK), but it made my life a whole lot easier, especially as the book I was using to teach me the stitches is British. Before, I always thought the US terms made more sense; the most simple stitch to do, and usually the first you learn, is a single crochet. The next simplest, and second you learn, is a double and so on. But after having actually done more crochet and starting to actually understand the mechanics behind it (as in, how each stitch is actually made and what it does in a finished project), I realised that the UK terms make way more sense. A double crochet? Yeah, two loops on the hook. Triple? That's three loops! Half treble? You only complete half the amount of stitches for three loops. I find that the UK terms just describe what it is you're meant to be doing! They make even more sense than 'knit' and 'purl', which by now are so ingrained in to my grey matter I don't think I'd forget how to do either in my lifetime. I would definitely recommend the pattern to any one wanting to learn crochet though.

Poppy leaf.
So yes, poppies. I crochet poppies now. I think it's the least I can do for those who have died for my right to sit here, in a free, relatively safe country. The fact I can write this blog, write about whatever I want, the fact I can go to university, the fact I can live this life, I owe it to them. They shed blood so that I, along with every one else, could live this life of privilege.

The facts? I used less than 50g of red acrylic yarn (which I had to make my boyfriend buy for me on his way home from work as I've completely misplaced my previous skein) for twelve poppies, probably about 25g, even less of black acrylic. I used similar amount of green cotton for the leaves. Hook size was 3.5mm. Each poppy took less than an hour to complete, although I tended to work in batches (so, five petals, then five leaves, etc.), rather than whole pieces. The pattern I used was Crochet Remembrance Poppy by Bilgewater Davis, which is a free pattern on Ravelry. The title of this post comes from In Flanders Fields by John McRae.

'If you could hear, at every jolt, the blood 
Come gargling from the froth-corrupted lungs,
Obscene as cancer, bitter as the cud

Of vile, incurable sores on innocent tongues,—

My friend, you would not tell with such high zest

To children ardent for some desperate glory,

The old Lie: Dulce et decorum est
Pro patria mori*.' -Dulce et Decorum Est by Wilfred Owen

*'It is sweet and fitting to die for one’s country.' -Horace

Thursday 30 October 2014

Blue Moon Hood

I really wish knitting was a quicker craft, then I'd be able to update this blog more often than once in a blue moon. I started it a little over a year ago (my first post was a few days after my 21st birthday) and this is going to be my twelfth post. Which averages out at a little less than once a month. I suppose that's not an awful figure, given that I'm usually a fairly busy person. That said, my new blog (which continues the Malice in Wonderland theme) is probably going to have twelve posts in a matter of months. It's just over two weeks old, two posts, I have a third that needs writing and two more planned for relatively soon (in which time I'll probably have finished the next book I'm reading and we'll be up to six).

Pre-assembly.
I guess I just read quicker than I knit. Psh. I used to have a bit of a problem when it came to books (don't worry, this is relevant to my crafting); I couldn't leave a bookshop without something in hand. Then I realised I had too many books and not enough time to read, so I gave up. Now, only one in five visits ends up with me purchasing something. Normally I'd be really proud of this (most people think I'll break my book resolve but it's been going for a year now; I will not buy... Outside of my set rules, anyway. Non-fiction, graphic novels and absolute bargains are totally allowed.) but I realised yesterday... I've just substituted books for yarn. Seriously. I cannot walk into a craft shop with quality yarns without leaving with something. I now have loads of 50g balls of super pretty yarn and... Nothing to make with them. I think I really need to get a knitting pattern book that focuses on 'one skein' (although even then, 50g is a minuscule amount). Eeeh, I'm sure I'll find something to do with them. This happened yesterday. I only went in for a button! One. Button. And I left with yarn.

I think I have issues. But then, I think that's endemic to crafters. You should see my mum's fabric hoard! (At least I realised that as gorgeous as the KnitPro Symphonie needles and crochet hooks were, like hell can I afford over £10 for a single pair, especially when I already have a pretty comprehensive set thanks to my Gran, and any that I don't I purchase for 20p a go from the local charity shops.)

Anyway, I digress. Last night I finished my latest (well, no, not really) knitting project and I was hit by a revelation (okay, okay, so I remembered this revelation); two and a half years since I learnt to knit, this is the first thing I've ever selfishly knitted for myself. I don't know if you recall but in my last post I explained my need to stop focusing on gifts for others and start focusing on gifts for myself? Yeah, this one is it. Which is pretty damned cool, if I say so myself. I just hope my gift receivers are even half as I am to get something handmade; 'cause it's such a great feeling to be able to say yep, I made this.

Okay, okay. So my need to knit selfishly started after Christmas, after I'd made three sets of knitted gifts for my family. My boyfriend had bought me a pattern (that I'm still working on) and the necessary wool, so it shouldn't have been difficult. However, it was just post Christmas and I felt like treating myself to something. I realised I no longer had a scarf (no idea where it toddled off to) and, hey, I knit, scarves are knit, why should I pay for something I can make myself? On to the Ravelry database and a search or two later and I find a pattern that I think will suit my needs. It's a hooded scarflet; I chose this over (several other) more 'regular' looking scarves because I wanted a hood (it always seems to rain when I'm not wearing my hoodie) and also because, at the time, I had the necessary yarn. It was just post-Christmas, like anywhere was going to be open, or that anyone actually wanted to leave the house.

I distinctively remember being sat trying to work out how to do long tail cast-on while watching The Gruffalo's Child on BBC. I don't know where my dad was as it was just mum and I, but it was a very Christmassy feeling, curled up on an armchair, knitting and watching fuzzy TV.

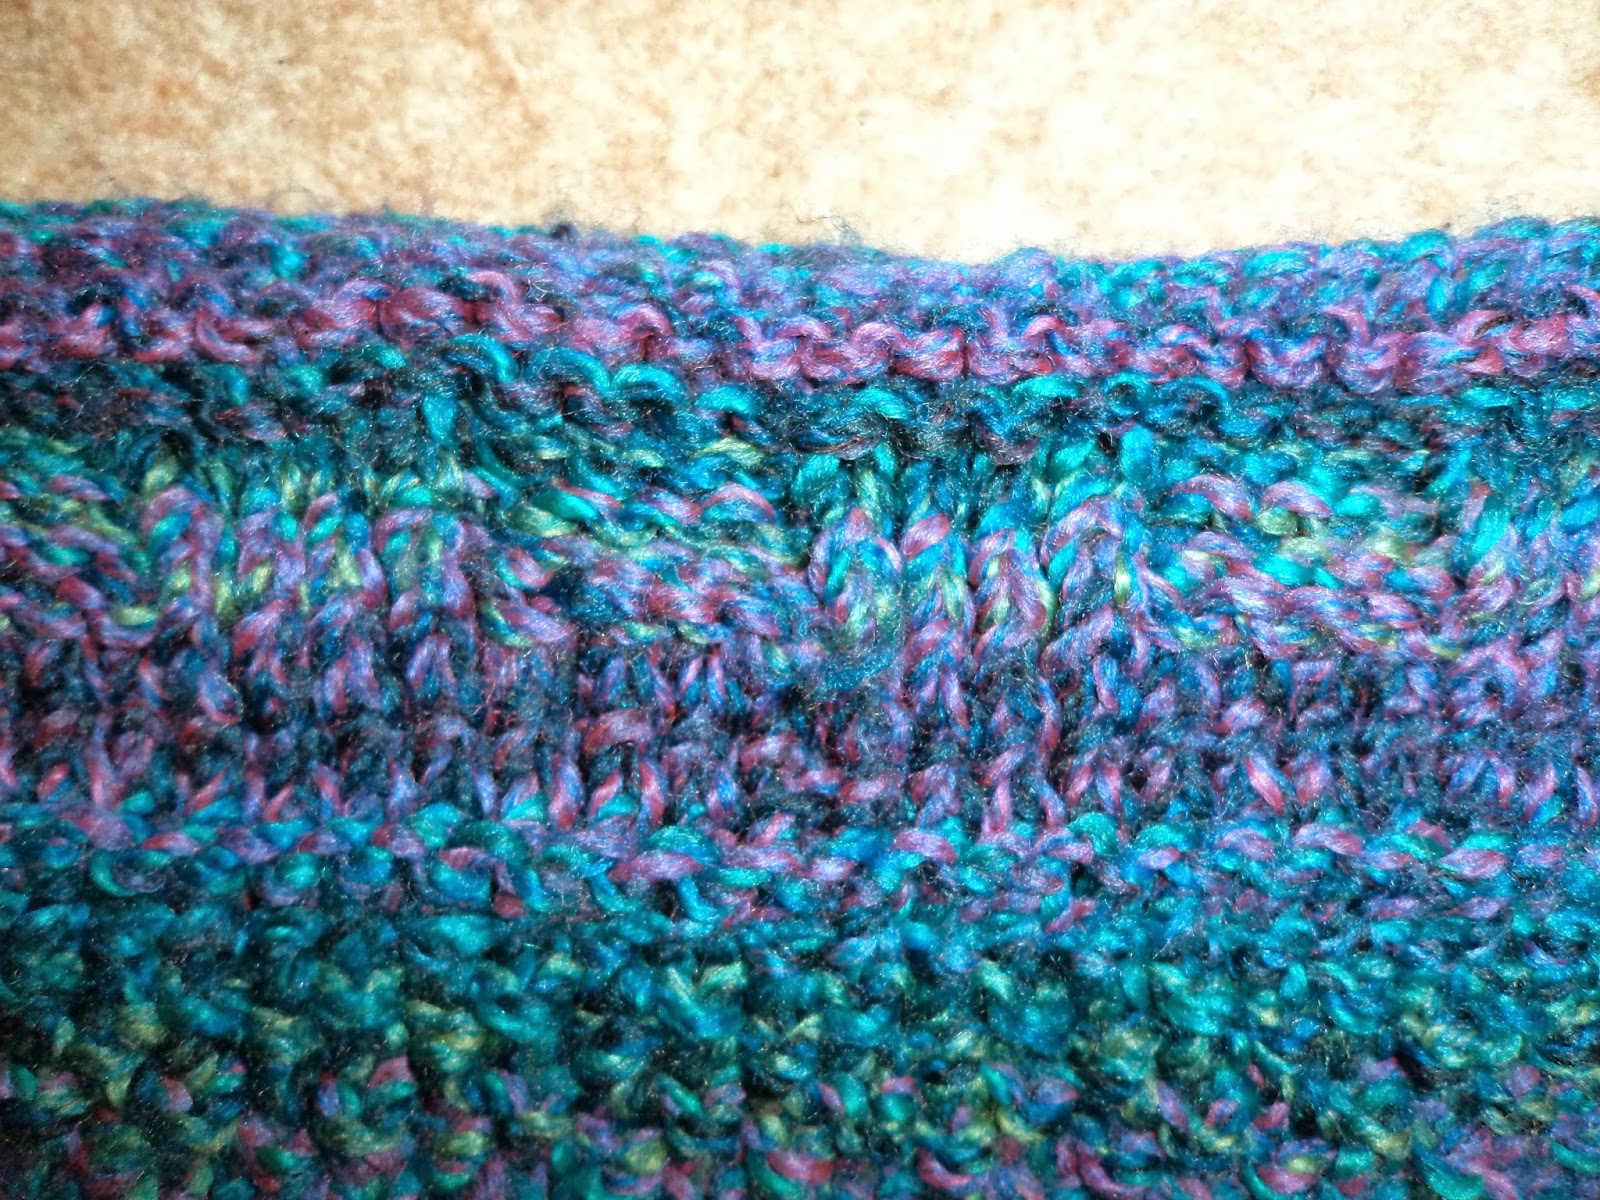
Chequered edging that is impossible to see.
Long tail cast-on is a pain, by the way. People say it gives a nice, stretchy edge rather than the firm one from regular cast-on, making it perfect for garments. Maybe it was because I was using chunky wool and big knit needles, but I don't really see the need for it. Perhaps it's the design/shape of the project; it doesn't need to fit over anything per se (like a cuff would over a wrist, for example) so it doesn't really need to be stretchy or firm. I don't know. I have used this method on a project since, and it was significantly less frustrating; probably because I a) knew what I was doing and b) didn't need to cast on 166 stitches. That is a lot of stitches. The way that long tail works, is rather than starting at the end of the yarn you start further in and make the stitches from the tail rather than the working yarn. It isn't a very difficult method of casting on, but when you have to guess how much yarn you need and get to 130 stitches before realising you didn't pull out enough? It's enough to make you want to sacrifice a small animal at an alter to the knitting Gods (I didn't, for the record. I like my pets far too much). If I remember correctly it took three tries to get the yarn at the right length for 166 stitches. Oosh.
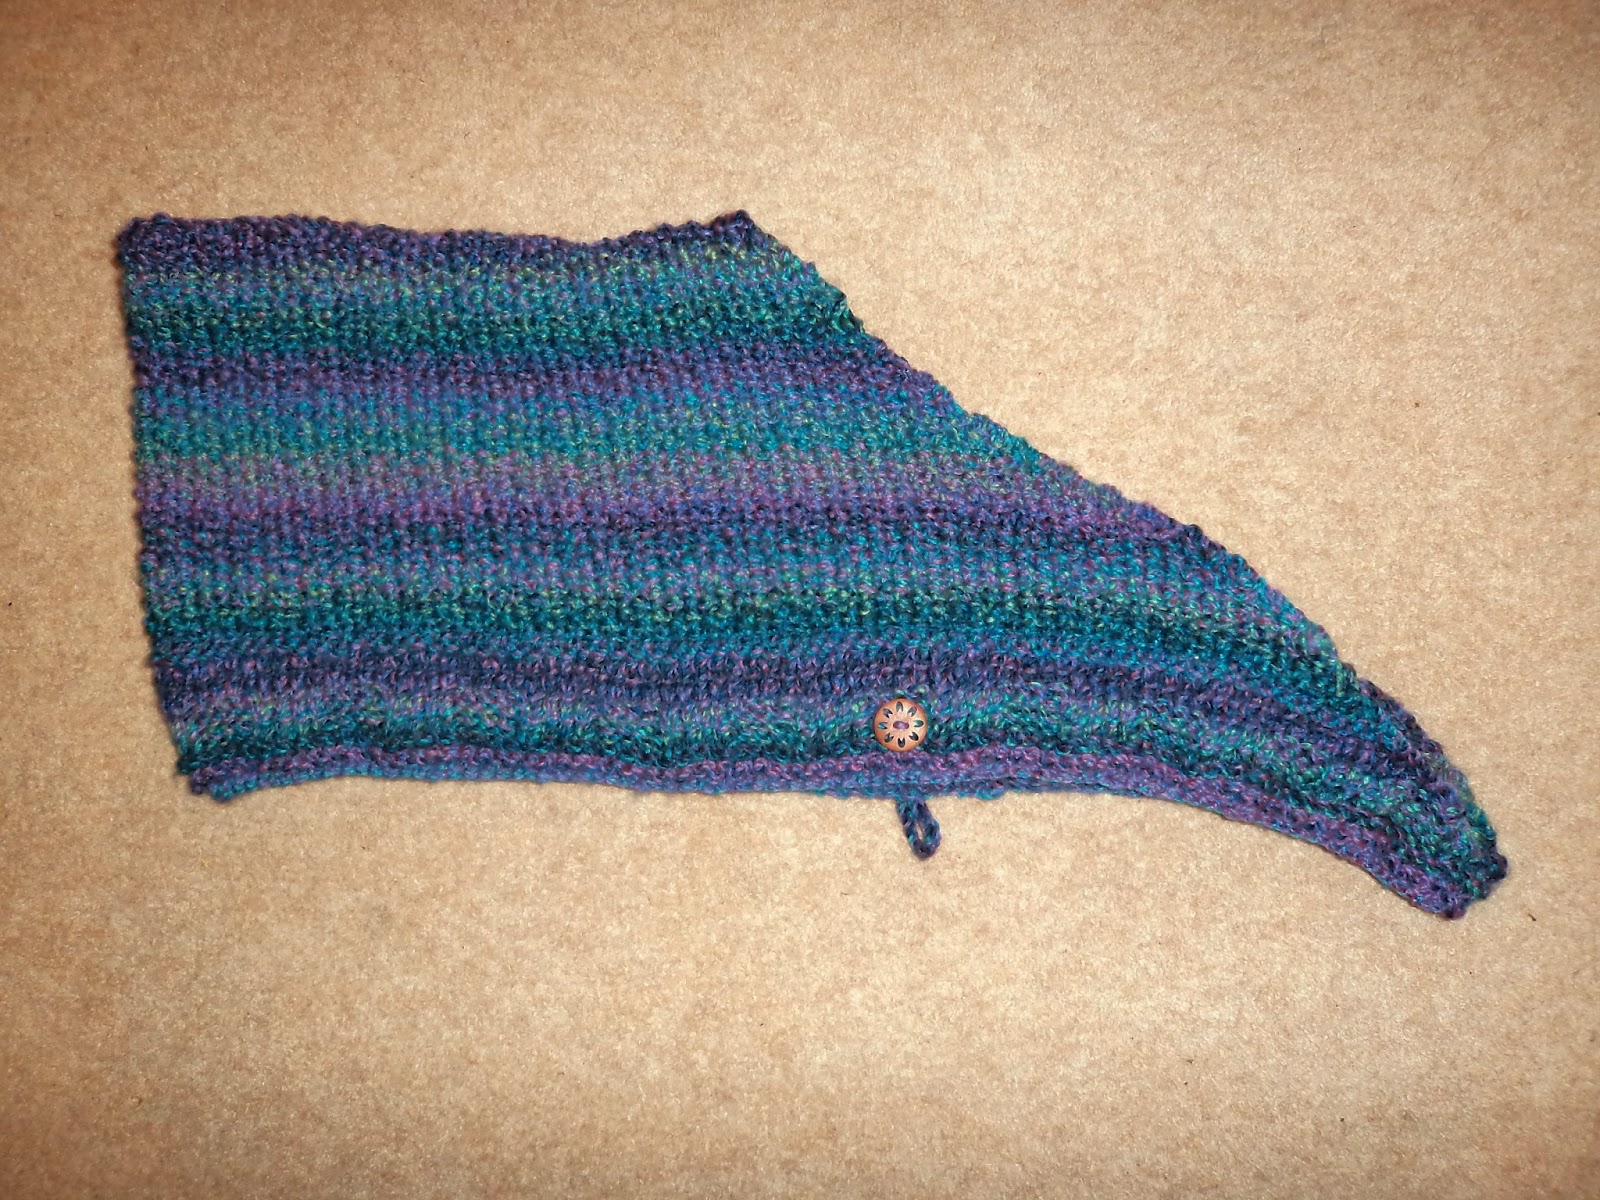
Post-assembly.
The casting on was probably the most problematic part of the pattern, though. Well, unless you include the fact it was knitted on circulars. Knitted flat, mind you, but still knitted on circulars. I can see why the pattern said to knit on circulars rather than straights; straight needles tend to be about 10"/25cm. You can get them longer (I have some insanely long ones somewhere, that just look a little bit unwieldy) but that's the sort of length you're looking at. So anything that is going to be longer than that isn't going to fit on the needles.

To recap; have you ever seen how long 166 stitches in chunky wool is? The pattern recommends using circulars with a 47"/120cm length and, yes, you need it. The finished scarf is 47"/120cm in length. So although knitted flat, that length is needed just to keep all of the project on! this was pretty much the first time I'd ever knitted on circulars (and, by extension, the first time I've knitted flat on circulars). I really cannot fathom how people prefer circulars to straights. yes, I understand that a pair of straights in such a length would just be unusable, so the time and place for circulars, this is it, but when there's a choice? How? I know full well I'm the minority here, as most people I speak to at the very least find circulars easier than DPNs but... Yeah, no.

That said, the circulars I bought are bamboo. I don't have very many bamboo needles (fairly certain anything less than 4mm I'd snap) as I mostly use metal, but, ah! I do love knitting on bamboo. it's really smooth and slippy, but in a different way to metal. I don't know. I just like knitting on bamboo needles. They're also no where near as cold as metal needles (obviously), which is a bonus in winter. Maybe I should invest in some more bamboo needles. Hmm. Then again, I do give my needles a beating at times, which metal needles survive much easier.

As an aside, I'm writing this blog while listening to the likes of Powerwolf and Sabaton. Knitting never felt so metal...
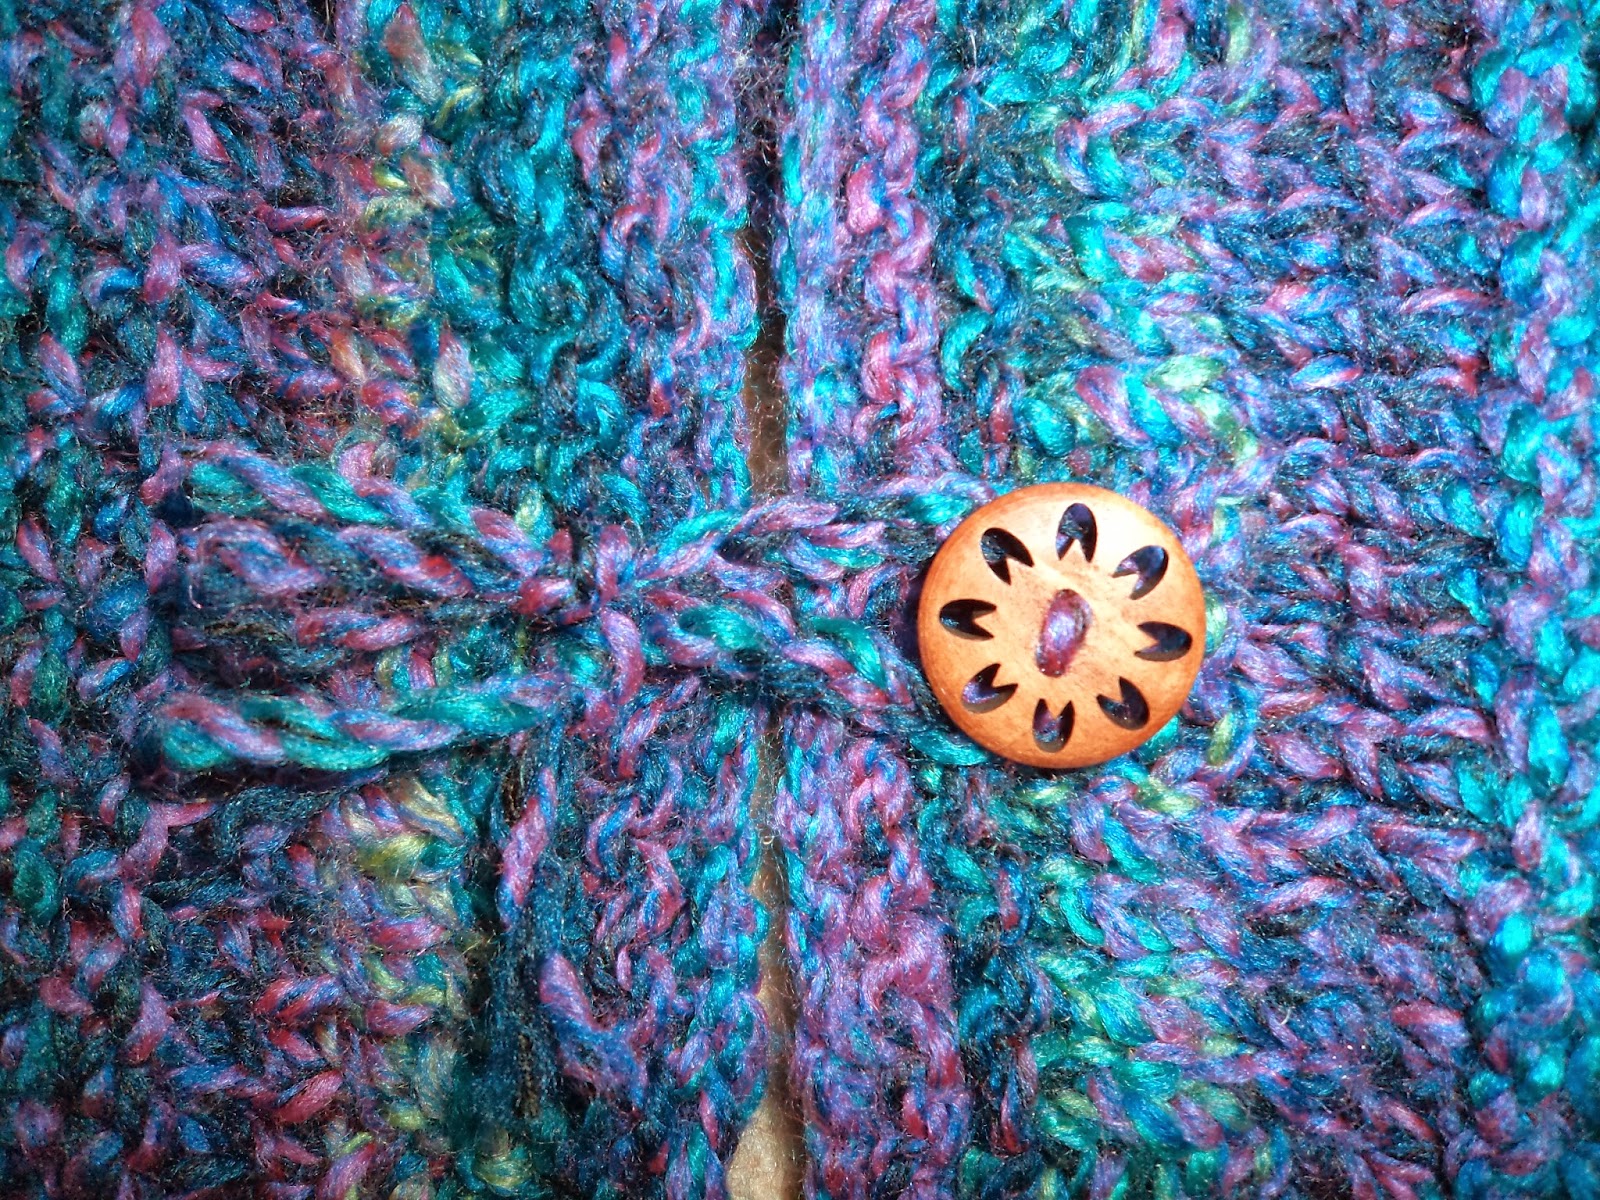
Button battle!
The hood has a sort of chequered trim, which wasn't a difficult pattern. it was just 'k5, p5' for the length, mostly. Throw in a few decreases. After the edging was done, it was just moss stitch. Moss stitch is dead easy, but it's one of my favourite stitches. It just looks all bobbly. The pattern refers to it as seed stitch, but they're the same. It's just 'row one; k1, p1, k1, p1, row two; k1, p1, k1, p1'. Easy stuff. To be honest, I used a variegated yarn (the same for my mum's slippers); the edging at the very least would have been more distinct had I used a solid colour. I think, if I were to repeat this pattern, it would either be in a solid colour (like the pattern suggests) or I'd do the edging in a solid colour then switch for the main hood (either to variegated or just a complimentary solid). Ah, well. It still looks pretty! And it used up some of my stash, rather than leaving me with extra yarn.

Fastening
The pattern is knitted in an equilateral trapezium shape; you start at the outer edge and work your way to the back, decreasing along the way. There's a little assembly required, but it really is absolute minimum. Which brings us to how one, simple project took me nearly a year to complete. I started the knitting in the winter, as established earlier. I did, however, get distracted by other projects, such Major Clanger, but over all the kitting didn't take that long. I mean, it's a (physically) large project so it was a bit time consuming, but it wasn't time consuming in the same way as smaller, more complex pieces are. It was great for sitting in front of the TV to do as I didn't have to think. My hands just did. So, yes. By the time I'd finished all the knitting it was no longer winter. It was spring. The cold weather had let up and I kind of no longer needed a scarf. I mean, I know it's England, but, no. It was too warm for a scarf by that point. Besides, I didn't have a toggle/button to finish it. So the scarf was left with one stitch left to cast off and a fastening to sew on.
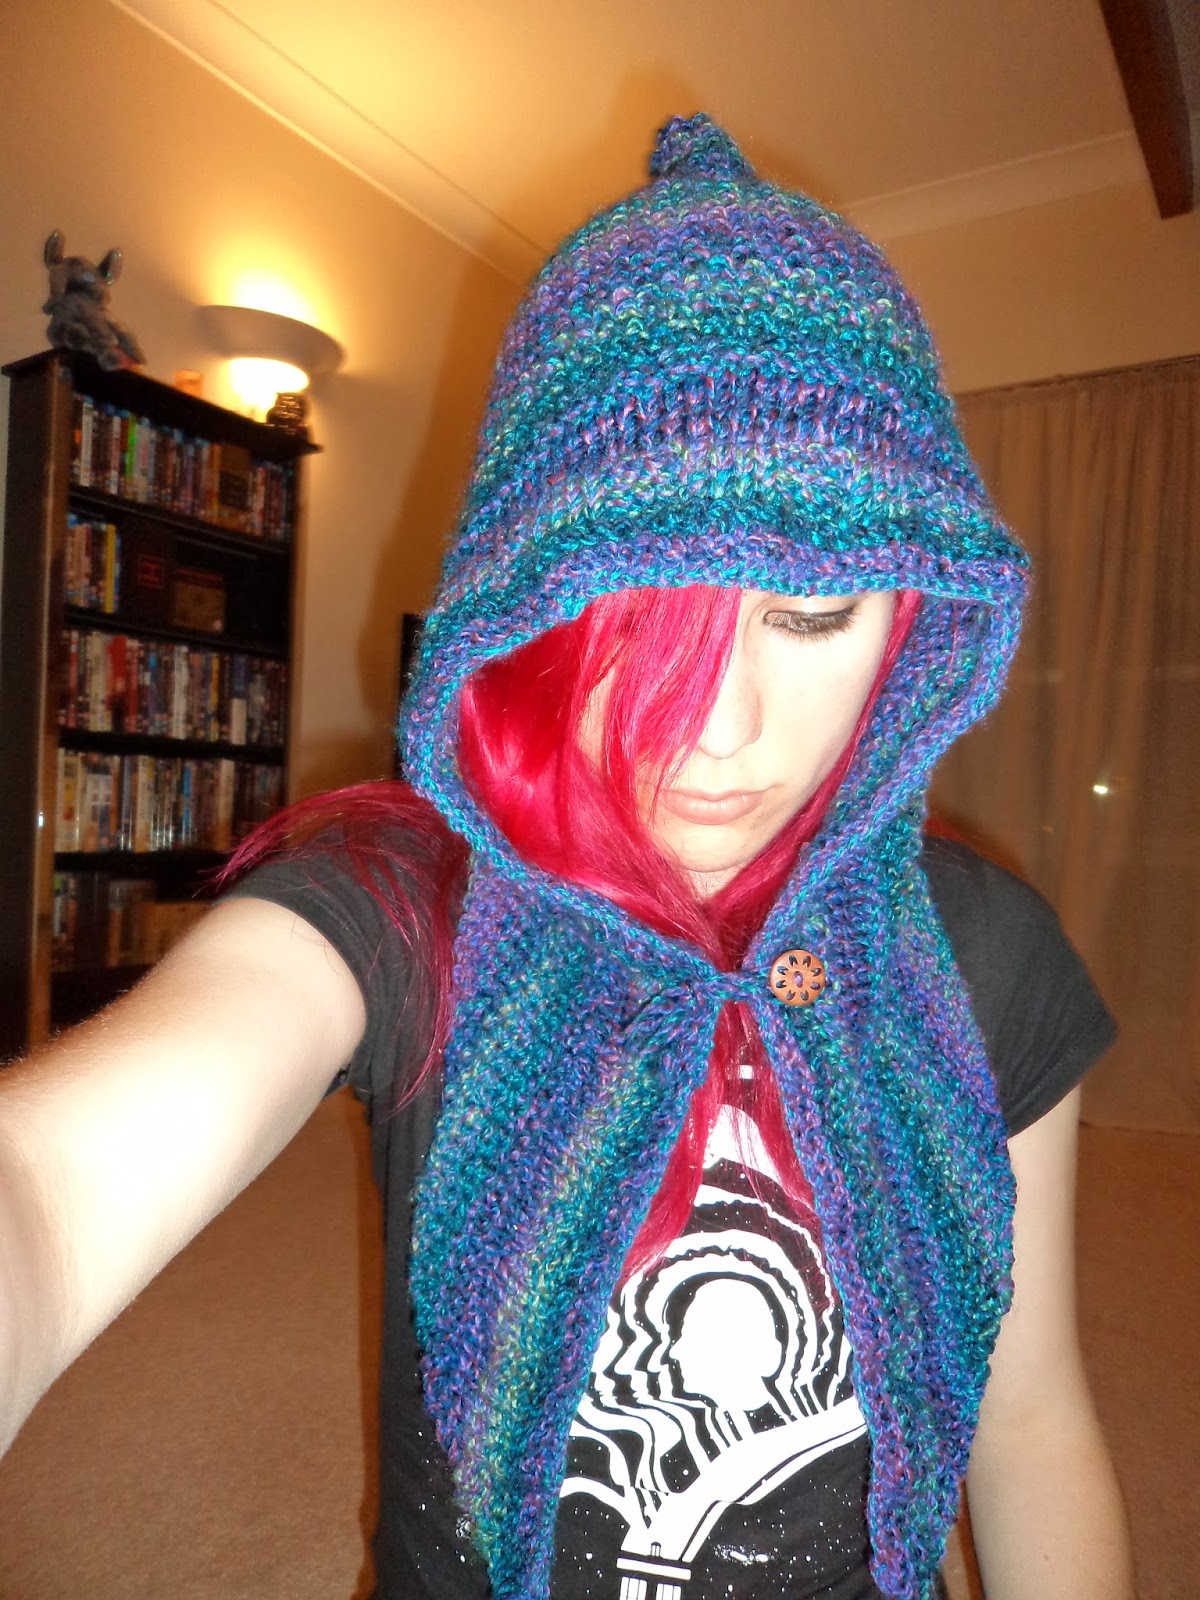
Pixie hood Malice.
Which brings us full circle. Remember I said I needed to buy a button yesterday? I wanted that button so I could finally finish my scarf. You know, seeing as the weather is actually getting pretty cool again (although the temperatures of the labs are like a morgue; at this rate I'll be needing gloves, scarves and hats for inside). I was originally just going to get a wooden toggle, but then I saw a couple of buttons I preferred; bought both, used one. As you do. Actually, one of the buttons I bought is sort of brass and green; I forgot that I'd used the blue wool, not the purple/green. Good job I did buy both in the end, as the little wooden button I did get looks really effective.

Last night I finally cast off the last stitch, sewed the back hem and added a button and fastening. Okay, so I placed the fastening in the wrong place to begin with, but no worries. Not too much of an issue to change. Given that I keep making toys at the moment, having something with simple assembly threw me a bit. Only took a couple of hours, if that. and I was being lazy and not putting my all in to it.

So now I have a scarf! Finally! And I also have a knitted item for myself. Overall? Yeah, I'm happy with this. I can't wait to wear it out.

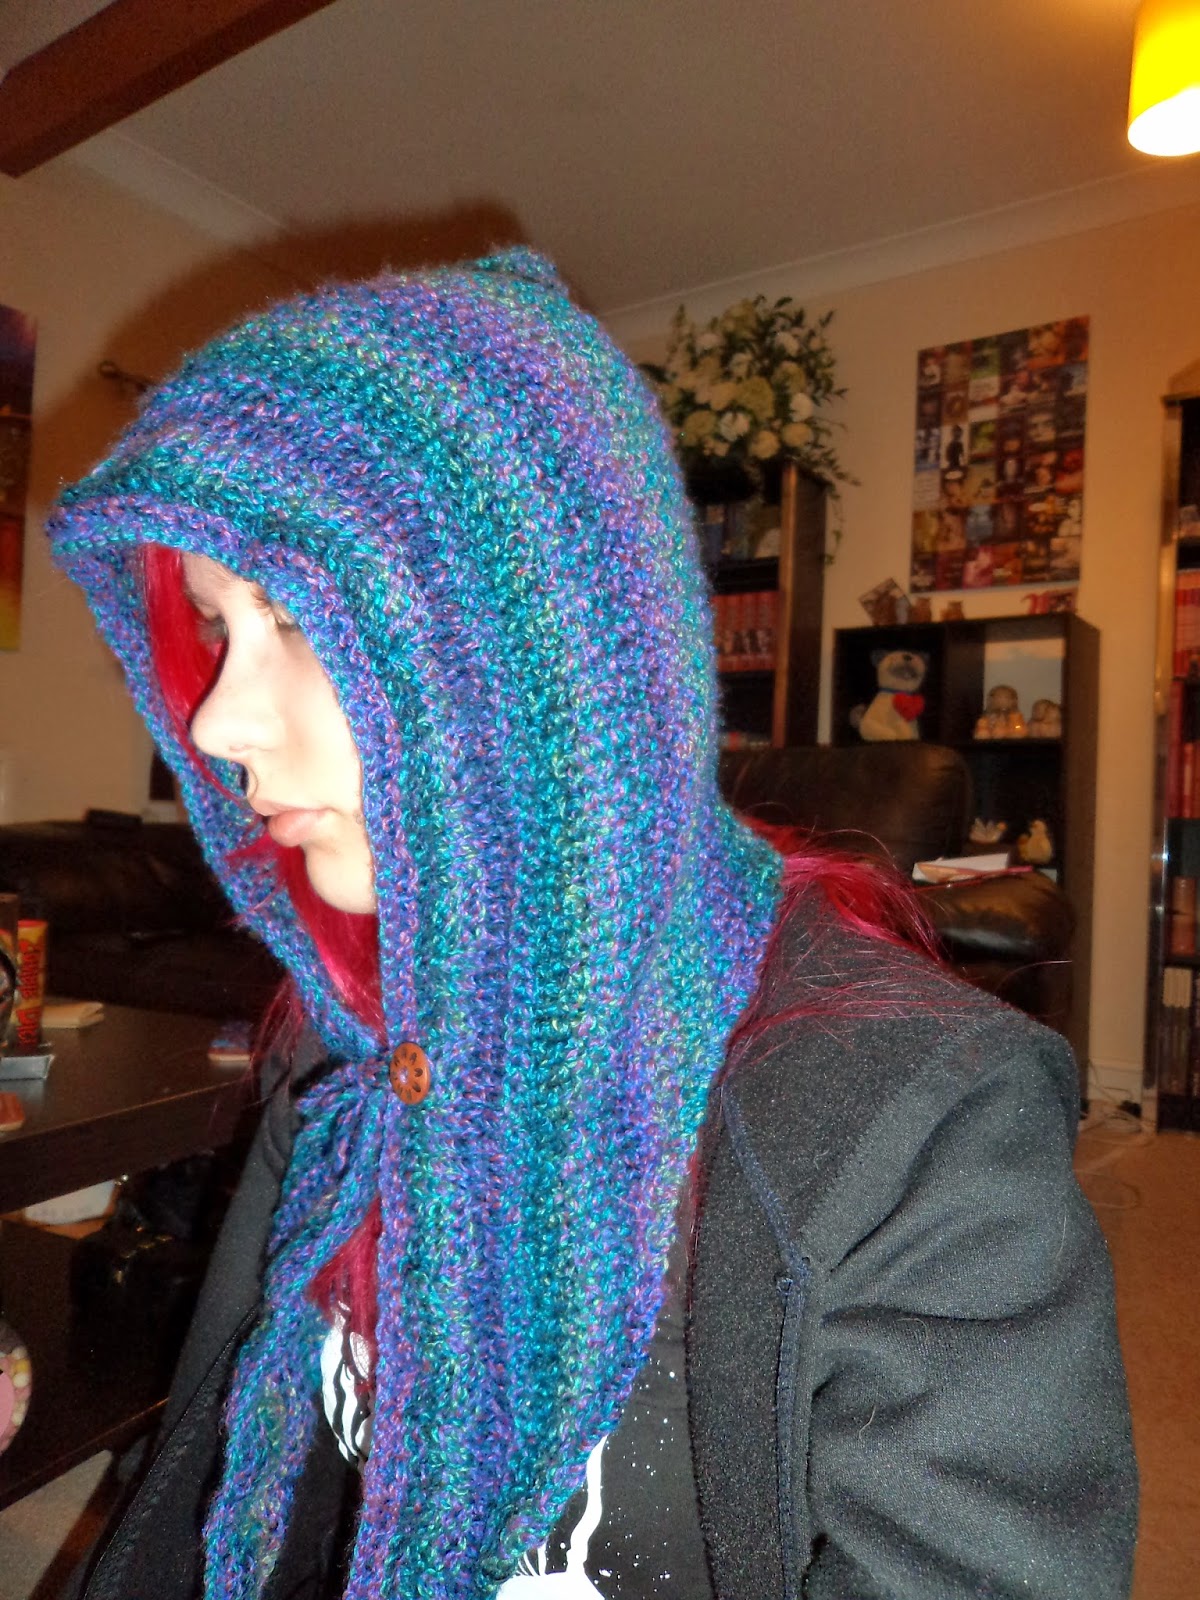
Showing off indoors.
Facts and figures. I used James C. Brett Marble chunky, in the blue. The pattern says I need about 300g, but I think I used less. It was a 500g ball and I swear I'd used more than 200g in a previous project. The needles were 8mm (UK 0) bamboo, 47"/120cm circulars. the fastening was made out of plaited yarn, the button was just a small 1"/2.5cm wooden piece. The pattern was Sage Woodland Hood by Rena Varsakis. Pattern is meant to have a tassel at the hood apex, but I chose not to include this. Original post was written in April, before Blogger decided to delete it...

Friday 19 September 2014

Two Blind Mice (And Four Sighted Ones)

On Ravelry I am part of a group called 'Selfish Knitters'. That is, people who almost solely knit for themselves. Sounds a bit mean, sure, but after last year with all the Christmas presents, I suddenly realised I hadn't a single object that I had made for me. As it happens, only three out of thirteen of my projects on Ravelry I've kept; one was a very simple crocheted tube for storing my crochet hooks in and the other two are works in progress.

I'm a terrible selfish knitter, but I have recently bought loads of new patterns for gloves, jumpers, etc., with only myself in mind so, for the most part, from here on in, my knitting is for me. I'm the one who pays for the materials and puts the effort in, so shouldn't I get something nice at the end of it? Anyway, I digress. Although I've made the decision to become a (more) selfish knitter, every now and then something pops up that actually, you know what? Is going to be completely selfless. And this project, is exactly that.

Humble beginnings...
At the beginning of August, the woman who taught me how to knit (what, two years ago now? Jeez, and I still consider myself a knitting newbie) put out an open request for a knitting project. It was something she needed doing but simply didn't have the time. I felt that as she had, freely, taught me knitting and has been a source of help in all things yarn related that I just couldn't pass up the chance to return the favour. It was, genuinely, quite wonderful to be able to do something in return. Yes, I picked up the needles two years ago, but I originally did it so as to have something to keep me busy at re-enactments (between all the other jobs that keep me busy), rather than as something to take up as a proper hobby. But it became more than 'just a re-enacting' thing; it became something I genuinely love doing. Something that keeps my creativity going. Something that, when I finish, I get excited about and proud of myself (forget a degree, look! I KNITTED SOMETHING.) I never thought that something so 'daft' such as knitting would become such a big part of my life. And, sure, my mentor could not have known that either (or, maybe, being an avid knitter herself she knew exactly what she was getting me in to) but, certainly, without her help it is a hobby, a craft, that would otherwise remained a complete mystery to me. So, if you're reading this, thank you so much. You gave me so much more than just the knowledge on how to knit; you gave me something to enjoy, to become proud of, to explore and learn. I just thought knitting a few, toy mice was the least I could do.

So what was this knitting project exactly? Well, as the title and previous may have given away, it was six toy mice. Two adult mice (mummy and daddy mouse), two children mice (sister and brother) and two baby mice (so one could be asleep and the other awake). Originally I thought this would be a fairly quick project, but, although individually the mice knitted up reasonably quickly, the number meant that this was a fairly time consuming project. I think, in total, it took about three and a half weeks for me to knit all of them.

I-Cord Tail
Now, this pattern was a wonderfully easy pattern. It was a nice change from the project I was (still am) half way through, which I'd probably rate about a seven out of ten for difficulty compared to the mice's three. They're the harder end of beginner, or possibly the easier end of intermediate. Bridging the gap, maybe? I'd certainly recommend this pattern to any beginner knitters wishing to expand on their techniques. Part of the reason I found this pattern so easy was because it was knitted on the round; I'm most comfortable when knitting on the round as this is (unusually) how I began. Straights (that's two needles, flat knitting) didn't half feel peculiar the first time I used them! For this pattern, I used between two and three plus one needles (two/three being the amount of needles with stitches on and the 'plus one' referring to my working needle; what would be the right hand needle in straight knitting). Apart from the baby mouse, which was the child mouse pattern on smaller needles. Unfortunately, I couldn't get a hold of any 3mm DPNs, which meant I was forced, for only the second time in my knitting career, to use... Circular needles. Now, for those unfamiliar with knitting (and I do apologise, because this blog is linked to Ravelry, meaning a lot of people more versed in knitting than I am read this, but I also know full well that I have Facebook friends who wouldn't know the difference between a DPN and a crochet hook if it stabbed them, which we all know can be a painful experience) DPNs are, as the full name suggests, double pointed needles. Circulars? They are essentially two straight (single pointed) needles, attached with a piece of tubing or metal, so as to create the same effect as knitting on multiple DPNs, that is 'knitting on the round', or, producing a seamless tube instead of a flat piece of knitting.

Damnable circulars!
Anyway. I remember a long time ago I joined a discussion online about whether people preferred DPNs or circulars. I was in the minority (and it was the minority by quite a gap!) in using DPNs. The vast majority of people seemed to either struggle with DPNs or just preferred the ease of circulars. At the time I hadn't even tried circulars and, ultimately, decided to stick with what I knew, which is why I continued to buy DPNs over circulars whenever a project called for it. Some people even preferred circulars to straights! As a newbie knitter I was under the impression that circulars were a miracle send to the knitting world and I was a bit of an oddball for preferring (or only knowing how) to knit on a billion needles and in doing so increasing my chance of stabbing myself on something pointy tenfold. And this project was my second project on circulars (and the first where I'd been knitting in the round, rather than using them as straights); so, surely, I am a through and through circular convert now? I have thrown all of my DPNs and straights to the wind and replaced them all with the glory and wonder than is circulars?

No. I despise circulars. I honestly don't know how people can use them, or find them easier to DPNs. DPNs are a piece of-; it's just straight knitting with extra needles! Easy as! Circulars, however! Oh, the yarn gets tangled, and then it loops around the needles and the working yarn accidentally gets knitted into a stitch and it flops about and the tubing pulls everything which way and JUST NO. Never, ever, ever. Nope. I am declaring war against circulars. I will march with my armies of DPNs against the evil that is circulars. To make matters worse, you know that delightful M1 stitch that I love so much? Yeah, that made a regular appearance in the pattern too. Between the circulars and the M1 stitch I'm surprised I had the emotional energy left to finish the mice.

The start of Kitchener stitch.

How Kitchener stitch should
look.
My first, botched, Kitchener stitch.
Still, circulars aren't the only thing I experienced in the course of this pattern and perhaps the befuddlement of circulars is a small price to pay for picking up Kitchener stitch in no time. Kitchener stitch, also known as grafting, is a sewing looking it up. Now, from the brief amount of research I did on Kitchener stitch (because before now I had NO idea what it was or how to do it) it seems that a lot of knitters struggle with it. Someone said that part of the dislike for Kitchener stitch was simply the fact it was sewing and not knitting (although I did find a tutorial on how to knit Kitchener rather than sew it, but I never tried it out), but I also get the impression that it confuddles people. I don't know. I think it's a bit like that awful yeast based spread product; you either get it, or you don't. And I fall into the former camp (for Kitchener, not Marmite). It just makes sense to me. It's P1 front, K1 back, (K1, S1 off needle, P1) front, (P1, S1 off needle, K1) back, repeat until done. I mean, my Kitchener stitch is far from perfect (and my first attempt I bodged) but it really doesn't seem as difficult as other people make it out to be. I don't know. Maybe it's not that uncommon to understand it and I've just found the wrong sources, or maybe I'm one of the lucky ones who can do it, problem free. Whichever it is, it's a great sewing technique. I love the finish it gives and I'm really glad I got a chance to learn it. Apparently, it's a very common method for finishing off socks, although not one I've used before (I just sew them closed). Definitely be using it for my next pair!
(yes, sewing, not knitting) method used at the end of a knitted piece instead of casting off; it's used to create a seamless piece of fabric, by making it appear as if the knitting from either side is continual. It's... Not that easy to explain in text alone and I never was any good at teaching so if you really want to know what on Earth I'm on about I'd recommend

Turkish Cast On
A few rows later...
My first, terrible Turkish Cast On.
My last, better, Turkish Cast
On.
Alongside learning a new way of finishing a project, I also learnt a new way of casting on. It's called Turkish Cast on. the pattern originally states (which did have me confused) that I needed two pairs of circulars for this cast on method. Fortunately, I found tutorials for both how to cast on using DPNs and a single set of circulars. I stall have no idea (or aspiration to find out) how to do this cast on method with two circulars. It just... Seems a bit redundant to me. Anyway, this cast on method is very similar to Kitchener stitch in how it looks. It creates a seamless piece of fabric. So, match the two together and you end up with a piece of knitting that seemingly has no beginning or end. It's great! My Turkish Cast on isn't as nice as my Kitchener stitch; then again, I struggle a little more with it. It's not overly difficult, but it requires wrapping the yarn around two needles, instead of regular cast on, which only uses one. You then knit into the wrapped around stitches and somehow, miraculously, end up with a piece of knitting with no edge. It looks really nice. Again, I find Turkish Cast on a million times easier on DPNs than on circulars, although I get a tighter, less noticeable cast on when I do use circulars... Not enough to make me a convert though; I'll just iron out my DPN problems.

That scene from the Exorcist.
Most of the body parts were knitted on the round, starting with Turkish Cast on, finishing with Kitchener stitch. The ears were knitted flat and the tail was i-cord (you always knit from the right and never flip the work), which again, was something I hadn't experienced before. So although this was an easy pattern, I actually learnt a lot from it. It was a really fun project; partly because it was selfless, partly because I learnt so much, partly because it wasn't frustrating. It was just... Fun. Which was really nice and made a change from doing something challenging. The mice came out really cute, too. I may have to knit one for myself (no, I'm not sick of the pattern yet, six mice on). Plastic eyes were added for the four older mice. I only wish I'd used a different colour yarn for my stitch marker when knitting them up. One thing I hadn't expected (which wasn't an issue) was because of the way each piece was finished, it meant they needed to be stuffed while still on the needles. I had been expecting to cast off, stuff and sew closed. Ah, stuffing toys. I'm going to become an expert at this rate. Once I'd knitted all the components (forty-eight in total), I packaged them up and sent them away. I'd been told they would be assembled, and my friend wanted to add wire to make them poseable and such, so I figured it was best to leave that to her.
Beady little eyes...

Overall, I really enjoyed doing this. It's such a lovely pattern; simple, but effective and the end product is so cute. I'm really glad I got a chance to knit it. It's a pattern that was already in my Ravelry library, but one I probably was never going to do, until this chance popped up.

Oh, and if anyone reading this needs any parenting help, queries or is in need of nannying services, you should definitely check out Orchard Green. This isn't as random an endorsement as it seems, however out of the blue it appears. This is said friend who taught me knitting. She's such a lovely person and very knowledgeable.

All bagged up!
In closing; three types of yarn were used. Two DK, in white and oatmeal (Stylecraft pure wool) and one in four ply, again, white (Four Seasons Hot Socks Uni). The white DK was for the adult and children mice, the four ply for the babies. The oatmeal was used for the tails and inner ears (except on the babies who had pure white ears). The adult and children mice used 4mm DPNs, while the baby mice required 3mm circulars; pattern stipulated double circulars for both sizes, but I substituted. 4mm push fit eyes were used for adults and children, while babies had their eyes embroidered (not by me). Pattern is Mouse by ViolaSueKnits. Pattern also gives instructions for mice sized scarf and hat, but these were not knitted.


That's next to 10p.

Bendy arms!


Hello Mr. Mouse.


Friday 12 September 2014

Major Knitting of Major Clanger

I feel that it's pretty apt that I managed to finish this project alongside the announcement of a new series of The Clangers (although they will be replacing the original knitted TV stars with more modern, CGI counterparts). If you remember, I first posted about this project way back in January and, to be fair, the knitting itself didn't take that long. I just took a hiatus on this project between completion of knitting and final assembly (that was several months; I probably finished the knitting part around Easter time and since have been working of my Lincoln Imp and a set of toy mice for a friend). I'll confess, I didn't really appreciate how much there was in the 'assembly' part and, as such, I'm not sure if this qualifies as a knitting project, a sewing project or something that combines both as well as painting, wire work and toy making.

Maybe it should just be tagged as 'toy making project', or just 'The Major Clanger Project', which sounds a little bit like some dark, government secret you'd find in a gritty, dystopian thriller.

Humble beginnings; or 'shaping'.
Clanger skin!
Anywho. The knitting part of this project is actually fairly complex. I mean, I wouldn't say it was difficult, but it certainly isn't a beginner's piece. For the most part, it is work in one long piece, which means there's lots of increases, decreases, turn (that's changing the direction of the knitting half way through a row so you end up with more rows in half of the project than the other) and all sorts of shaping. Only the arms and ears are knitted separately and they take no time at all, but the main body is time consuming. I also found the weight of yarn to needle ratio problematic; as it's a toy, the knitted fabric needs to be quite firm, so needles that are actually a size or two smaller than what would normally be required are used. This makes the stitches smaller and, as the yarn is still bulky, tighter, to create a nice, sturdy fabric that won't show or be misshapen by stuffing. Unfortunately, I'm already a tight knitter, which meant that my stitches were insanely difficult to knit. Honestly, my knitting was so tight I was having to peel the paint off of my needles to give just an extra few nanometres of space to move the stitches around on. I, uh, also bent one of my needles into an 'L' shape by fighting those stitches. Twice. That's a lot of force put into simply knitting a damned stitch. Fortunately I have a nice dad (and boyfriend) who had the tools required to straighten out my needle, although it does have a little kink in it where the bend occurred.

Ready for sewing.
I did learn how to do the 'm1' or 'make one' stitch in this pattern. It's a near invisible increase and not that difficult to do. Guess what? I hate it. Even thought it really isn't all that hard to do, I always forget how to do it and, if knitted wrong, instead of leaving an inconspicuous increase it leaves a giant, gaping hole in the fabric. So several undoing of rows, or pulling down of the entire project are needed every time I encounter an 'm1'. I wouldn't even mind so much, but every project that I have done since this (which, as I said early, is only two, or five depending on how you look at it) uses the 'm1' stitch. And if I haven't done said stitch in about three days I forget how to do it and have to look it up. It's infuriating. I don't know why I struggle so much with this stitch, but I just do. That and, particularly on this project, picking up the bar? Well, you know I mentioned that the knitting was impossibly tight? Yeah. That made knitting the 'm1' require a small act of God at times.

Bah. I hate m1. And it's stalking me where ever I go, mocking me and my inability to do it correctly. That's alright, only another four Clangers to go. And probably every knitting pattern I pick up from here on in!

First assembly.
Still, as horrible as it was to knit at times I actually, for the most part, enjoyed the project. Or maybe that's retrospect talking, as I just adore the finished product. Quite easily my favourite and, in my opinion, best of my knitting projects. In fact, at this date, it's the only one of my projects on Ravelry that I've awarded the highest happiness rating to (when you finish a project it allows you to rate how happy you are with the finish object; there's five little smiley face, with the first being really upset, the second being a bit miffed, third being kind of 'meh'/neutral, then a small smile then a giant smile. most projects get the small smile, this go the big smile).

Anyway, as I said, this project ultimately entailed a lot more than just knitting. I had intended to finish/assemble Major over summer when mum (read; the toy making expert in our family) was about to help me out. Because although I will jump wildly in to any knitting pattern, regardless of ability required, give me a needle and thread and I quake with fear. However, due to one thing then another it just didn't get done. My dad said it was fine, finish it and give it as a Christmas present, which he said was apt as it had been given as a Christmas present. But I didn't want to give it at Christmas; it was always meant to be a 'just because' (or maybe a 'thank you for buying me knitting stuff') present and it felt like I was cheating to save it for December. I knew my dad (along with the rest of my family) was coming up for my graduation ceremony so I figured I would make and finish it to present then.

Queue the song No Fear, as this became a completely solo project.

Never has a Clanger looked so evil...
Clangers drink tea, as well as soup!
The assembly wasn't overly difficult, to be honest, just time consuming. First I sewed the body piece together and then stuffed him. That was more difficult that I first envisaged as I foolishly didn't leave a very big hole at the bottom to stuff him. As such, his nose isn't very firmly stuffed (which means it's somewhat poseable, so that's a bonus?) but the rest of the body is. Once the body was stuffed, the hole was sewed up, then arms were sewn together, stuffed, and sewn to the body. After this came the 'cutting stuff out of felt' bit. Fortunately, my parents had provided me with al(most all) the felt I needed and had already scanned and blown up (boom) the patterns to the correct size. So I had to cut out two tiny, pink hands, two black eyes, two bits of pink felt for the ears, a tiny oval of pink for the nose, four feet (they sandwiched a piece of card, so each foot was made of two pieces of felt) and all the necessary components for Major's armour. I also had to cut out hair from brown felt, which was the only colour I hadn't been supplied with. Although the pattern says to make his armour from felt, in the show it's actually metal, so they did suggest painting it gold. I did this, but didn't realise they would need over night to dry. Oh well, no big issue... Right? I spent Monday day and evening sewing Major and assembling all his body bits, so by the time I went to bed I had a finished, but naked, Clanger. That meant I only had to put his armour together the next day. Only, the next morning, as I got out my jewellery wire (I make wire rings/jewellery on occasion, so have reels of gold coloured wire, which was just perfect for the finishing touches to the armour), and started adding the holes and wiring everything together I suddenly realised... The armour didn't fit. Even though it was the right size, there was just no way I was going to get it to all connect seamlessly. So I had two options; fix the front and back panels and have gaps at the side or try and make some panels to fit the gaps. Which meant more painting, even though my parents were coming that evening.

Back and front panels of armour.
So paint away I did. The panels are a little large, but I don't think that matters too much. After fixing the rest of the armour together and creating the harness that it all hangs off of (and then having to rush around tidying the house) I eventually got the hair dryer out to quick dry the paint. It was still a little wet by the time I decided to fix it into the rest of the armour, but not so wet it was going to come off on anything. Then I glued the 'C's on the front and back with PVA and, again, used the hairdryer. Then all that was left was to dress Major.

Adding holes for wiring.
And didn't he look fantastic. I had been pretty pleased when I'd just finished him, but the addition of the armour really made it perfect. As I've said before, I really am pleased with the project. The only thing I think is perhaps a bit iffy is his feet (I'm not a fantastic sewer and they were really difficult to sew on); they may need sorting out some time, but now he's in the hands of my dad (which means mum is nearby to sort out my sewing mishaps). They're just not as secure as I would have liked, but, hey, learning curves. Overall, I still think he's brilliant.

Extra panels being added.
So after he was made, all that was left was to leave him on dad's pillow to find later on that evening. I think dad was just as happy (if not more so) than I was; it's always a great feeling when your hand made gifts are genuinely appreciated. Everyone was pretty impressed with him, which is always a confidence boost. My boyfriend even tried to convince me to keep him as, he said, it 'was a shame to give away something that so much effort had been put in to'. But no. As much as I love Major Clanger, he was never meant to be anything more than my creation. And I'm glad that my dad likes him so much.
'C' for 'Clanger'.

As always, the base facts. Used a pink DK wool (no known brand, acrylic) with 2.75mm (UK 12) needles. About 50g of yarn was required. Needed gold, brown, black and pink felt, plus gold wire and thin card, to finish the project in total. The body, arms and ears were sewn with a tapestry needle and yarn; the felt (feet, inner ear, hands, nose, eyes and hair) were sewn with matching thread and fine needles. No sewnign was required for the tunic, although wire tools were needed to secure the wire 'staples'. Assembly too two days, knitting took a couple of months. Pattern was from The Clangers, by creator Peter Firmin, Carol Meldrum and Ruth Herbert.

Major Clanger!
 
The happiest Clanger.

Thursday 21 August 2014

Just Passing Through; Passport Wallet

Hello to all and anywho still read (or who, maybe, have stumbled across this blog from somewhere on the web). Long time no post, ey? I know that's how so many of these blog posts start, but there is good reason for it this time. So, as you know (either because you know me or because you've read the previous posts) I've been working towards a degree. Well, I'm not now. Since last September I've been in my final year and after Christmas pretty much everything took second place to my degree. So this means that I have neither had the time to blog, nor the time to actually do any crafts to blog about. (As it happens I have this post and one other completed thing that I can blog about, but I don't currently have access to the photos. Yes, since February I have genuinely only completed two projects; oddly enough, they're both sewing not knitting.) That said, it was worth putting aside every single hobby of mine to work on my degree; I mean, it's not every day you walk out of university with a First Class Honours. So why the delay in blogs? Because I'm awesome.

Zip, zip, zipping away!
Anyway. It was my father's birthday back in July. Since I bought my sewing machine I've been buying a fair amount of craft/sewing books, and in one of them I found a pattern for a passport wallet. Recently, my dad has got a job that requires international business trips again, so I figured this would be a useful present, as well as a fairly simple way to improve my sewing skills.

Now, it's not just a passport cover, this. It's a bit bigger and has a load of different pockets to keep various important things in. So, passport, boarding passes, business cards, etc., etc.. There is even a keyring inside for hotel keys (although most hotels use cards now, don't they? Ah, well, good job there's a card slot on the front!). I'd known for months that I wanted to make this for my dad but didn't actually get started until the week before his birthday, as I wanted my mother's guidance (don't I always?) Unfortunately, trying to sew something for someone when you live with them, isn't the easiest thing, so lots of stealth was required. Fortunately (and I know he's going to read this) my dad isn't the most perceptive of fellows, and he never really noticed my mad dashes to hide the sewing stuff. That, or our living room is always in a perpetual state of 'mid-sewing project', courtesy of my mum and our re-enacting. I don't know. I suspect both.

Top is the outer fabric, bottom two are the lining
and the inner pocket, the black is the card pocket.
As with the vast majority of my sewing projects, I didn't go shopping for fabric, but instead raided the spare room. I needed three fabrics; an outer fabric, an inner lining and one for bias binding. There were some nice red cottons, but I eventually decided on a green brocade for the outside and a paler green for the lining. As for the bias binding? Well, I just bought some black bias binding tape instead. I'd never used bias tape before, let alone made it from scratch (and, to be brutally honest, the pattern was poorly written; I think I would have just got confused and ended up binning the project). I also needed a zip; originally I was going to go for black (to match the bias tape), but I had a green one left over from when I had knitted a pair of SackBoys last year. I had thought it wouldn't work well, being a different shade to the lining, but actually it compliments it (the photos do not do this justice).

Zippered wallet
Something interesting (at least, to me) was that the wallet contains plastic pockets. The pattern said to source plastic sheeting, the kind that would be used for table coverings; I, however, decided it was cheaper (and easier to source) plastic wallets. You know the kind teachers use at school? Big, A4 size plastic wallets, with plastic slidy zips at the top? Yep. I got some of those. I figured they would be durable enough for the wallet, given that they were essentially for transporting bits of paper anyway (which is, for the most part, what the wallet will hold).

Inner pocket with two plastic pockets.
Plastic is an interesting material to sew with. It's a lot hard to flatten, as it buckles quite noticibly, than fabric if not sewn perfectly flat. Furthermore, it's a pain if you have to unpick a seam, as once the holes are made, they're there forever. This can either look messy, if they're not covered up later on in the process, or, if they're not lined up properly, can make the holes of the next seam 'loose' (if the next holes are lined up so they partially overlap the first ones). That said, I think it really adds a sophisticated look to the wallet, making it not appear so home made (even if that is the charm of hand made gifts). Fortunately, the bias tape covered up the imperfections on the edges.

Pockets pre-sewing.
The wallet is essentially made up of different rectangles and squares in different materials. The largest rectangle forms the outside, then a slightly smaller one for the lining. Using the lining farbic again, a pocket is made that fits half of the inside. Then, on the other side, is a plastic, zipped pocket, followd by two open plastic pockets on top of the lining pocket. Finally, a small rectangle is added to the front to form a card pocket.


Lining/inner completed.
All of the fabric was backed with interfacing, to give the whole structure some rigidity. I added some to the card pocket, as per the instructions, but as I was using heavy weight wool and not cotten it really wasn't necessary, and, ultimately, just made more work for me. The use of so much interfacing did, however, make sewing difficult as there was often upwards of four layers to sew through (outer, interfacing, interfacing, lining; then often plastic, or another layer of interfacing and lining). I'll confess, some parts I did struggle with (and I think the machine did, too). I don't know what it is about my mum's Brother (aha, heehee, no, not my uncle), but I always seem to mess it up. For whatever reason the thread coming from the shuttle always gets tangled. I set it up correctly, it works and then, out of nowhere, the thread wraps itself around the shuttle and jams the machine. Literally, every project I have done with that machine has had this problem, and I honestly don't know why! My mother can't replicate it, even if she wanted to. Between this and the thick layers, there were times I wanted to throw everything out of the window.

Finished product! How swish!
Still, I got it all done in the end, even if I was a little late (I had to finish it on my dad's birthday, which meant he knew he was getting something hand made a few hours before he got it, as I had to kick him out of the living room. He thought he was getting Major Clanger, who, I have to admit, is still unfinished. Fully knitted, but needs putting together and his clothes making. Part of this, along with the reason mentioned earlier, is because I don't actually own any stuffing and haven't got around to buying any yet, so I may as well just pilfer mum's). My dad was really pleased with it, and, actually, so was I. I'd had great fun being really finicky and OCD with the bias binding tape and making sure none of the stitching was visible, even though it was just extra work for myself and not actually integral to the project. Mum had to do the last bit though (the sewing of the bias binding on the outside), as her hand sewing is far superior to mine; it meant not only was it less visible, but it also took a fifth of the time to do. The bias binding was also used to fix the keyring in place, and to make a pen holder between the inner pocket and the zip.

When I asked my father to comment on it, he responded with (and I quote), 'it's f***ing cool!' As only my father can.
When closed; card slot.
 Some facts then! The whole project took me three evenings. I could have done it in less time, but sewing it had frustrated me, and it was agreed that I needed to take time out (as in, finish it the next day/his birthday) to make sure I finished it well, rather than rush it and botch it. It measure 11"x11" (when open) or 11"x5.5" (when closed). The pattern was taken from 100 Pretty Little Projects, which is a great book for ideas, but not one I'd recommend to beginner sewers (not because the patterns are particularly difficult, they're just not very clearly written).